

Getting WordPress MU to work with IIS7
The deployment of this and a couple of other blogs I am currently working on was delayed as I struggled with the "broken image" issue most people have been encountering when deploying a multi-site WordPress 3.1 blog to a Windows IIS7 based web-server. There are some...
Monitor Controller update 2
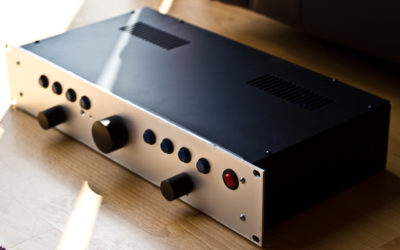
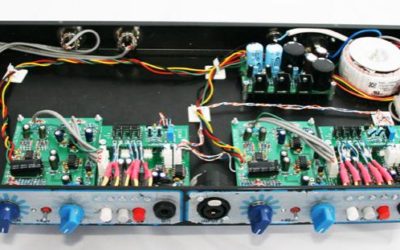
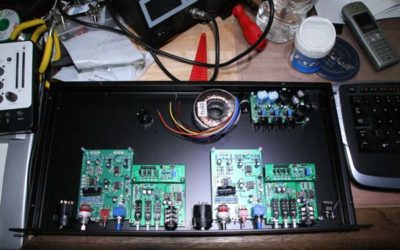
Another update. Construction is now complete. I installed a heatsink on the regulator in the volume control board, that issue is now solved. I picked up a new voltage regulator board for the PSU from the kit supplier Conrad. Installed that and power is now working correctly.
Monitor Controller update
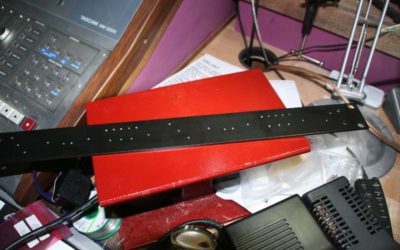
Quick update: I’ve now finished assembling the unit. Several hours with a CorelDraw template, a centre punch and a variety of drill bits in my pillar drill resulted in a case with all the holes prepared. The wrinkly appearance of the front panel is purely down to the protective film that’s still stuck on until the unit is finished:

Construction time again…
I’ve finally made a start on building a passive monitor controller. I’ve had a good look at the various options available on the market and decided that I can build the kind of spec I’m looking for much cheaper than I can buy one.
Self built MIDI controller
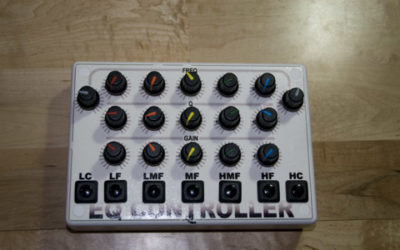
I’ve spent the last few months building a new MIDI control surface specifically for controlling EQ plugins. It was an idea I had last year. I actually pitched the idea to Novation, along with a mocked up image of what it could look like as I thought their rotary encoders with the LED rings along with their Automap software would make for an impressive package. Sadly, it seems they filed it under “R”. That left me with my only option – build one myself.
DIY Cubase keyboard control surface
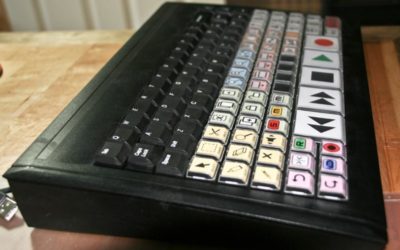
I have had this one planned for a while... I was just waiting for something suitable to turn up on eBay and last week I managed to snag a used EPOS keyboard for £5... woohoo! It's a USB keyboard and is the TM_KMR128A made by Tipro (product info). All the keys...
FiveFish SC-1 completed
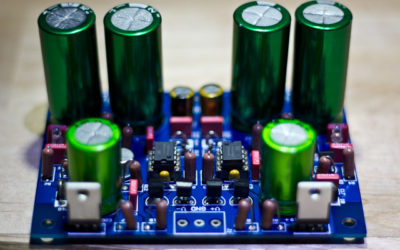
I finally found some time to finish the internal wiring of the preamp. Next job will be tests and VU meter calibration. I only need the meters to give a useful indication rather than accurate metering... more important is that they are both closely matched to each...
FiveFish SC-1 update 5
Having finished the PCB builds and then had a little break I have now made a start on the metalwork. Today I have drilled the front panel. First of all I sellotaped a full scale print out of the front panel design with cross hairs on each hole position and used a...
FiveFish SC-1 update 4
It's been a little while since the last update, things have been busy round here which has meant a little bit of a delay in the build. I finished off the build of the rest of the boards at the weekend: 2 VU module boards, one DI board and one SC-1 preamp board. The VU...
FiveFish SC-1 update 3
Another update. I built one of the DI add-on modules last night. For each of the two channels this will add a high impedance active DI input and three switches to offer a -20dB pad, phase reversal and mic/DI select options. Again the build was fairly straight forward....
FiveFish SC-1 update 2
Tonight I assembled one of the main SC-1 preamp boards. It was also cool to try out my new temperature controlled soldering station... *so* much better than the old Antex iron! I did have one mishap though. I managed to snap the leg off a ceramic capacitor as I was...

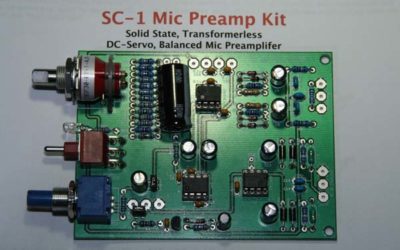
FiveFish SC-1 update
I have now assembled the first board: the PSU board. All components installed except the power LEDs which I'm currently thinking may be best mounted on the front panel. Whilst taking it steady and double checking the value and orientation of each component as it is...
Recent Comments